Building a Custom Toast Notification System in Blazor with Bootstrap
Toast notifications are an essential UI feature for any modern web application. They provide quick, unobtrusive feedback to users. In this article, we’ll walk through building a custom toast notification system in Blazor Server, styled using Bootstrap 5, and designed to be easily invoked from anywhere in your app using a C# service.
🧩 Why a Custom Toast System?
While there are third-party components for notifications, building your own gives you:
- Full control over the appearance and behavior
- Zero dependency on external libraries
- Clean separation of logic (service) and UI (component)
Let’s dive in!
Step 1 – The Toast Service
We start by creating a service interface and implementation that allows showing different types of messages:
public interface IToastService
{
    void ShowSuccess(string message, string title = "Success");
    void ShowError(string message, string title = "Error");
    void ShowWarning(string message, string title = "Warning");
    void ShowInfo(string message, string title = "Info");
    void ShowCustom(string message, string title = "Custom", string iconUrl = null);
}
And the implementation:
private readonly List<Toast> _toastComponents = new();

public void Register(Toast component)
{
    if (!_toastComponents.Contains(component))
        _toastComponents.Add(component);
}

public void Unregister(Toast component)
{
    if (_toastComponents.Contains(component))
        _toastComponents.Remove(component);
}

private void Broadcast(Action<Toast> action)
{
    foreach (var component in _toastComponents)
    {
        action(component);
    }
}

public void ShowSuccess(string message, string title = "Success") =>
    Broadcast(c => c.ShowToast(message, title, "success"));

public void ShowError(string message, string title = "Error") =>
    Broadcast(c => c.ShowToast(message, title, "danger"));

public void ShowWarning(string message, string title = "Warning") =>
    Broadcast(c => c.ShowToast(message, title, "warning"));

public void ShowInfo(string message, string title = "Info") =>
    Broadcast(c => c.ShowToast(message, title, "info"));

public void ShowCustom(string message, string title = "Custom", string iconUrl = null) =>
    Broadcast(c => c.ShowToast(message, title, "custom", iconUrl));
Don’t forget to register the service in Program.cs:
builder.Services.AddSingleton<IToastService, ToastService>();🧱 Step 2 – The Toast Component
Now let’s create the Razor component ToastComponent.razor that displays the UI.
@inject IToastService ToastService

<div class="toast-container position-fixed top-0 end-0 p-3" style="z-index: 1050;">
    @foreach (var toast in toasts)
    {
        <div class="toast show align-items-center text-white bg-@toast.Type mb-2" role="alert">
            <div class="d-flex">
                <div class="toast-body">
                    <strong>@toast.Title:</strong> @toast.Message
                </div>
                <button type="button" class="btn-close btn-close-white me-2 m-auto" @onclick="() => DismissToast(toast)"></button>
            </div>
        </div>
    }
</div>

@code {
    private List<ToastModel> toasts = new();
    protected override void OnInitialized()
    {
        (ToastService as ToastService)?.Register(this);
    }
    public void Dispose()
    {
        (ToastService as ToastService)?.Unregister(this);
    }

    public async Task ShowToast(string title, string message, string type, string iconUrl = null)
    {
        toasts.Add(new ToastModel { Title = title, Message = message, Type = type.ToLower() });
        StateHasChanged();

        await Task.Delay(5000);
        toasts.RemoveAt(0);
        StateHasChanged();
    }

    public class ToastModel
    {
        public string Title { get; set; }
        public string Message { get; set; }
        public string Type { get; set; } // success, danger, warning, info
    }
}
This component uses Bootstrap’s built-in classes for toast styling. The type value maps to Bootstrap contextual classes like bg-success, bg-danger, etc.
🧱 Step 3 – Include the Component Globally
Now make sure your toast component is rendered in your layout file (e.g., MainLayout.razor):
<ToastComponent />
@Body
🧪 Step 4 – Usage Example
You can now inject and use the toast service anywhere:
@inject IToastService ToastService
<button class="btn btn-primary" @onclick="ShowWelcome">Show Toast</button>
@code {
private void ShowWelcome()
{
ToastService.ShowSuccess("Welcome back!", "Hello");
}
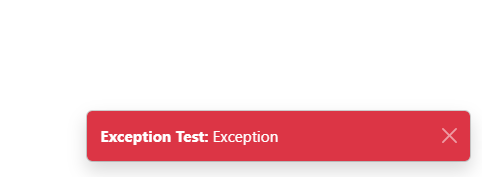
}✨ Result
This creates a lightweight, reusable toast system that can grow with your application. You can add support for icons, animations, or custom positions by tweaking the component.
✅ Conclusion
You’ve now got a fully working, highly customizable toast system in Blazor! Whether for form validation, API errors, or user feedback, this solution is adaptable, elegant, and Bootstrap-compliant. Happy coding!